During winter, your skis become an extension of you. This year, instead of letting your old skis go into hibernation in the corner of the shop, here are three great ways to put your old sticks to use.
Beginner Run: The Shot Ski 2.0
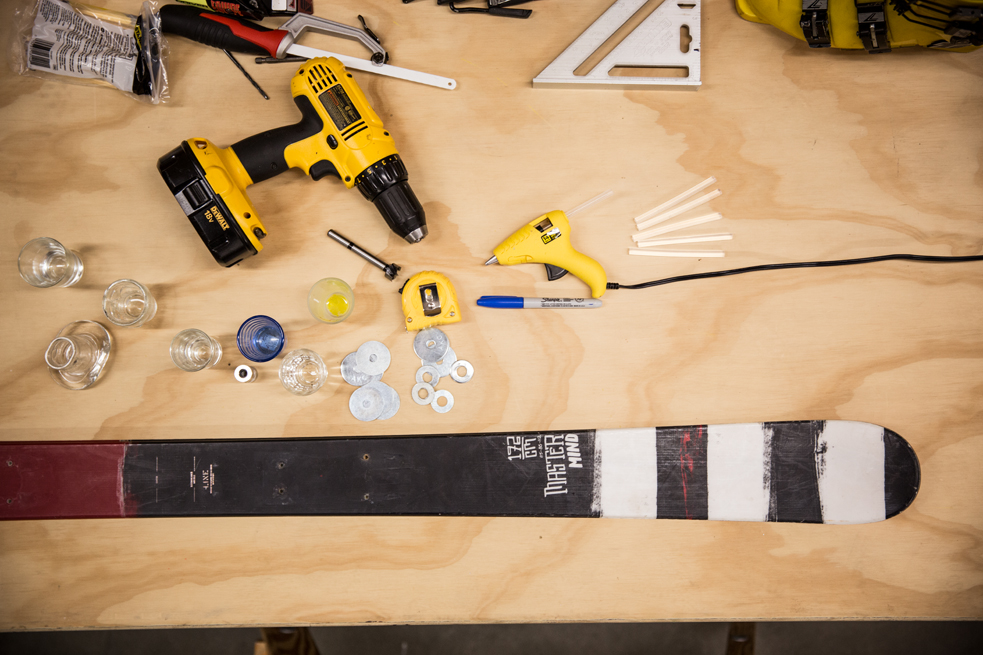
Lift, tilt, drink, success. The Shot Ski is a favorite of thirsty mountain folk everywhere. Good news! We’ve taken the time to update the old après standby by making it quicker and easier to clean the glasses after each round by using magnets and some glue.

What You’ll Need:
- 4 round magnets, approximately ½ inch in diameter
- 1 hot glue gun and hot glue sticks (or superglue)
- 1 retired, well-loved ski
- 4 shot glasses
- electric drill with circular bit (1/2 in. or closest to magnet size)
- 4 ½ inch in diameter washers
- measuring tape
- permanent marker
The Ski:
1. Heat your glue gun.
2. Measure out the ski in four equal parts and put Xs in the center of each part. “X” marks the spot where you’ll drill insets for the magnets.
3. Using the circular bit and applying even pressure, drill down into the top of the ski to the height of one magnet (so the magnet will sit flush with the top of the ski when set inside) but do not drill all the way through the ski.

4. Apply a small amount of glue to the bottom of each drilled hole.
5. Drop the magnets in the holes and press to adhere.

6. Let dry overnight.
The Shot Glasses:
1. While the magnets are drying, grab four shot glasses, the glue gun and the four washers.
2. Flip the shot glasses upside down. Place a dab of hot glue on the bottom of the glasses and press the washers down until set.
3. Let the glue dry.
4. Once dry, set each shot glass onto a magnet to assemble your shot ski.

5. Clean your work space and invite friends over to test your new Shot Ski 2.0.

We’ve been…