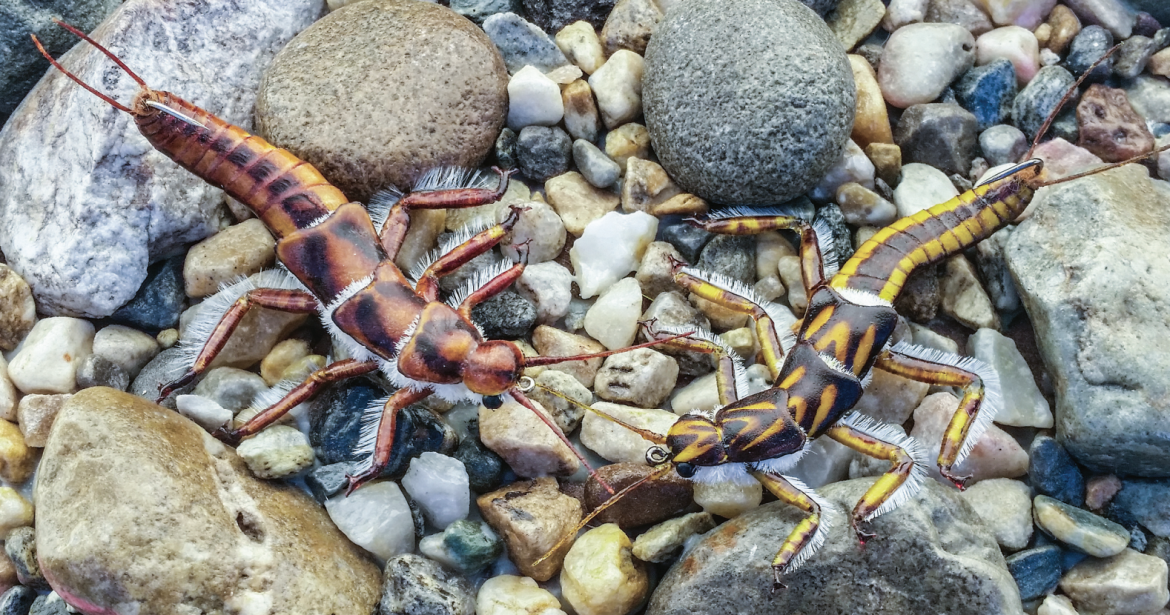

Have you ever wondered, How do they do that? A master shares his secrets for tying a lifelike stonefly nymph.
[by Scott Stryker]TYING REALISTIC FLIES MAY SEEM A BIT INTIMIDATING, but with a little insight and understanding, it is not hard to do. When it comes to making realistic flies as art, there are no rules or patterns to follow. Hopefully the techniques I share will help take your tying to another level and give you some insight into realistic fly tying.
Stonefly nymphs are probably the first flies most tiers want to make. Whether it is a stonefly nymph or any other type of pattern, there is no limit to the detail you can add. Although it is time consuming to craft, the stonefly in this article is fairly straightforward and requires only a few materials: thread, foam, monofilament, and chenille. That’s it!
First Thoughts
Having a vise with pointed jaws and good holding power is a key to tying realistic flies. This type of vise gives access to the hook when making all the parts of the fly and holds the hook securely in a variety of positions.
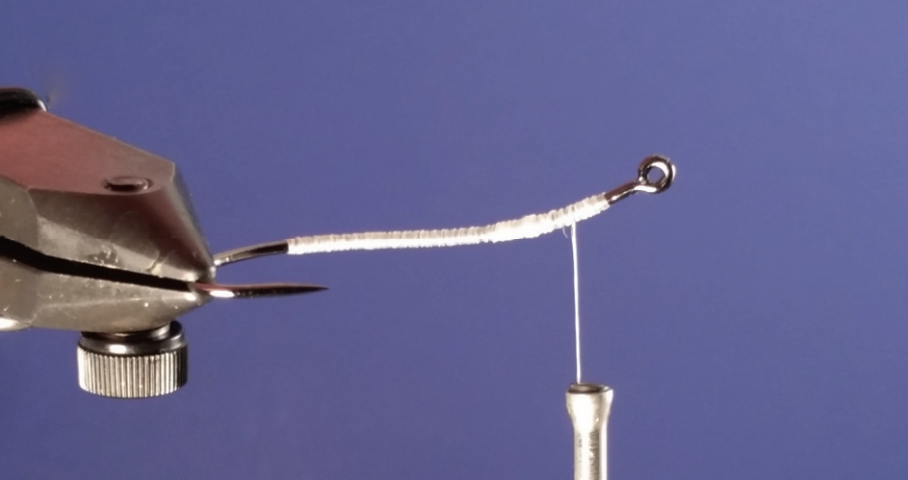
Keep in mind that hooks are not always designed to fit the particular fly you are tying. It is often necessary to modify a hook. You might want to bend the hook to make your fly appear as though it is moving, or the shank might be too short for the fly you wish to tie. You can extend the length of the fly using narrow-diameter wire, such as the .031-inch stainless steel wire I use in this pattern, or you can substitute the shank of another hook.
Whichever method you use, you can lengthen or shorten the shank as you go along, or reattach the hook eye as you come to the end of the fly. Because this is a display fly, I have chosen a new Partridge hook for its display-quality finish, but you can use any 3X-long grasshopper hook I use a small piece of shaped flat plastic, such as a section from a plastic fork, as an underbody. Whatever plastic you use, first smooth the edges with a fine file so it does not cut the tying thread. A little prep work will save you some frustration later on.
Stryker’s Realistic Stonefly Nymph
Hook: Partridge CS54 or any 3X-long grasshopper hook.
Thread: White 3/0 (210 denier).
Abdomen and wing pads: Fly Foam.
Gills: Stiff-fibered chenille and ostrich herl.
Antennae and tail: Maxima chameleon monofilament.
Legs: Tying thread over monofilament.
Eyes: Plastic dumbbell eyes or melted 20-pound-test monofilament.
Color: Permanent markers.
Crafting the Body of the Fly
Realistic stonefly nymphs are tied using a lot of different materials; the majority of ingredients are stretch elastic. I prefer using thin foam because it is so easy to color using permanent markers, and the ink bleeds together, which gives me the realistic look I am trying to achieve. The color I start with is not always the color of the finished fly. For this particular fly, I start with tan foam and color it yellow. This yields better results than just starting with yellow foam, plus the yellow ink bleeds well with the other colors when I coat the foam with clear nail polish. The amount of time the colors sit before coating determines how much they will bleed together; the longer the colors dry, the less they will bleed. When using yellow and brown, like on this pattern, I apply the ink and then coat the foam with polish about 10 minutes later. I then quickly place the foam in the freezer for a few minutes, which gives it a nice sheen.
Regardless of the brand of yellow marker I use, if superglue comes in contact with the ink, the color turns bright red. If it is necessary to do…